Monday, December 29, 2008

My Top 5

I was inspired today by a curious shopper (you know who you are!) to list some of my favourite crochet books, and how to find them. To that end, please see the new box to the right, sandwiched between "Inspiration" and "Resources", entitled, "My Top 5 Crochet Books". They are all currently available from Amazon.co.uk (and probably other Amazons as well!), and I own all of them, and have worked through more than one pattern in each. If you're an experienced crafter, or a complete newbie, I'd recommend them all, regardless!

Also, although it didn't fit on the sidebar, I cannot heartily enough recommend Saucylouise's Etsy Shop (and her main shop), as a resource for fantastic Japanese crochet books. I have a slipper pattern book from her, and it's one of my favourites, and I even went through a *serious* slipper-making phase because of it! Japanese patterns are my favourite because they're cute, dainty, and contemporary (I don't know what the trouble is with us Westerners, but it seems like so much out there is just an elaborate tea-cosy!). If you have some experience crocheting, you won't find it difficult to follow these books, because they are filled with brilliant, easy-to-read diagrams. However, like I said, you will need some experience beforehand to understand the context of the stitches, and how to do basic things like finishing, increasing, decreasing, the like!

Finally, I would just like to warn the wary internet shopper...There are several peeps out there on Etsy (and other places) who are in the business of copying Japanese patterns and reselling them, translated into English. I don't care who you are, that's stealing, and I'm not having any of it.

If it doesn't say it's an original pattern, don't buy it!

If you want to buy a Japanese pattern but you're afraid you won't be able to understand it, you can most likely ask the seller. Also, there are great forums at Craftster.org, where you can get loads of free help.

Okay, that's enough of me ranting for now...Happy hooking!

UPDATED 18th January 2009: I've re-jigged the layout of the site, so my favourite books are now in a carousel right at the top. I hope you'll be able to use this a little better than just the links!

noisypitta.etsy.com

Monday, December 15, 2008

FINALLYOMIGODFINALLY

Well, kids, I finally did it. I finally posted my VERY FIRST pattern on Etsy. Wooooooo...That means that TLOPTIWMODWIGATI(IS) -- The List Of Patterns That I Will Make One Day When I Get Around To It (I Swear) -- is one item shorter!

Anyway, have a look at it: PATTERN Amigurumi Kitten Finger Puppet


It's a cute little kitten pattern, quite simple and quick, but fun. I hope you like :)

noisypitta.etsy.com

Thursday, August 28, 2008

He's going to Aus-tra-li-a!!!

Ah, my latest project is kind of a sad one...I am losing a good friend because he's emigrating to Oz in a couple weeks, so I wanted to give him something special as a leaving gift. And yes, I considered THAT, but it's hardly appropriate...Moving on.

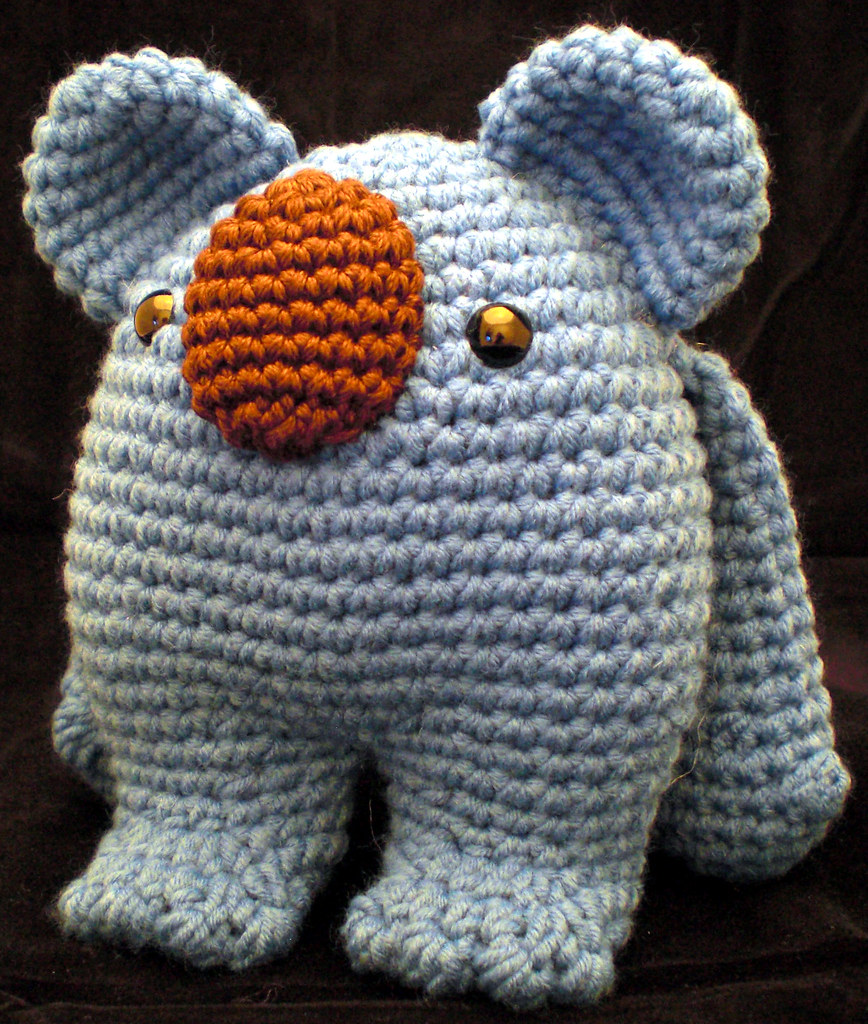
Anyway, I was hit by a wave of Aussie inspiration (and quite a lot of Home and Away), so I came up with a little koala! I think he's quite precious, and actually quite simple to make, so I'm adding him to The List Of Patterns That I Will Make One Day When I Get Around To It (I Swear).

Here he is!

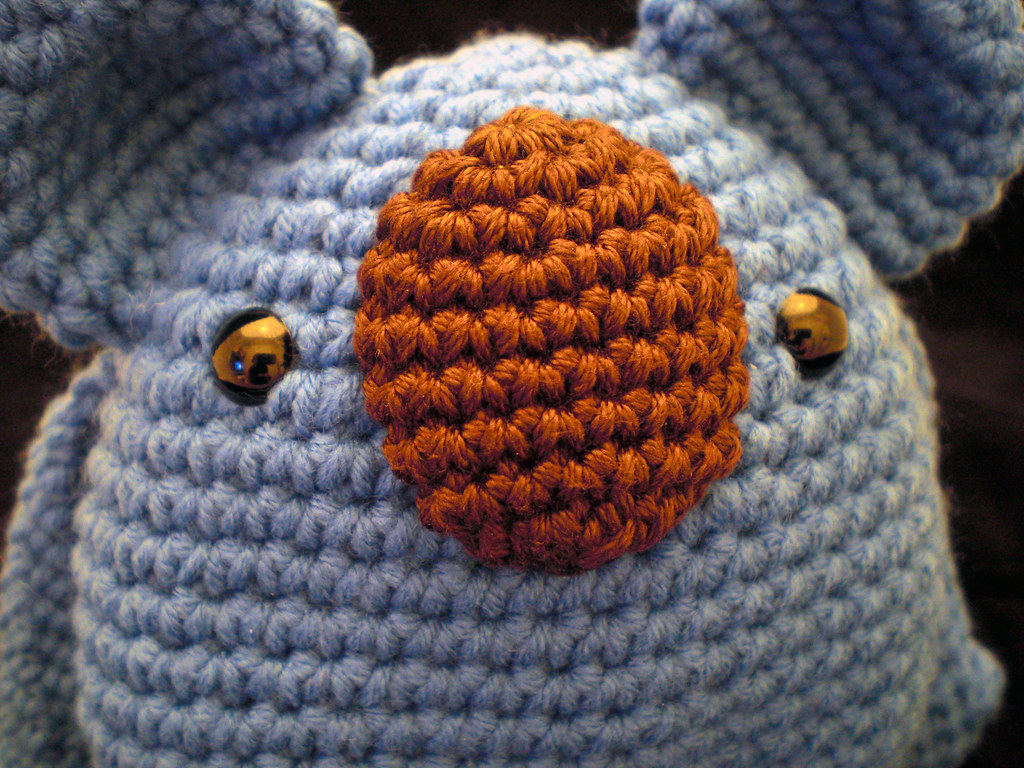
Oh, and I just have to show this pic as well...Look at his little nose!!!


I hope you like :) Oh, and for Brian: good luck with everything and don't worry..."it'll be fine."

noisypitta.etsy.com

Saturday, August 2, 2008

New bunny, and frilly tips

I finally finished the little "thing" I started when I went crocheting with shinykatie. I took with me some lovely lilac-coloured organic wool and had intended to make a little bunny, but then I got sidetracked by THE DRESS (which I have now abandoned, for reasons I will explain in a bit)...Anyway, I finally went back to it, and have come out with this:
I'm quite pleased with it, actually, and the frilly bits took a bit of tenacity, let me tell you! It's fairly straightforward, but very easy to pick up and lose stitches quite easily.

To make the frilly part of the 'gurumi, you alternate working in the front and back loops of your stitches: in the front loops, do a sc, 5 ch, then sc in next front loop, all the way around. Then go back to the back loops, and do a sc in each loop around. If you do any shaping (e.g. increases/decreases), do them in the sc stitches in the back loops.

For this particular project, the frills started out with 1 ch between every sc in the front loop, then on the next round, it was 3 ch between each sc, then 5 ch between. Doing this gives it kind of a graduated look.

Anyway, yes, the only reason I was able to finish this dude was because I have finally abandoned my dress, after I assembled the bodice and I had one HUGE armhole and one tiny one. Then I tried to fix it with the sleeves, but I used the wrong hook, and basically I haven't got the concentration to carry it on for now! I am holding out hope that I will eventually want to go back to it, but I was just missing my 'gurumis too much!

noisypitta.etsy.com

Monday, July 14, 2008

Testing, testing...

You may have noticed me complaining in the past that one of the hindrances to me progressing with my craft (ooh, does that sound pretentious, or what?) is that I have no permanent setup for taking decent photos...

Well, folks, that is about to change! I got myself a photo tent off eBay from Next-Gadgets Ltd, for about £10, and so far, it's a serious step up. Here's the first shot I took in it:
I still have some tweaking to do on the setup, such as the colour balance (as you'll notice, the white is, like, SUPER bright!), and I need to do some test shots at night, since that's when most of my work gets done. READ: that's when the toddler is asleep...

However, it's still a great little thing. I love the velvety backgrounds because they're non-reflective, and it all being in a tent means a lot less shadow. My next step is to get some kawaii Japanese fabric to make some backdrops with, just to jazz it up a bit!

Oooh, I'm so excited, I can hardly contain myself!

Now, if I can just finish that DAMN DRESS and move onto some more fun things...

noisypitta.etsy.com

Wednesday, June 25, 2008

Yes, I'm probably crazy

For those of you who haven't yet witnessed my insane witterings on about having been to London last weekend (and which I referred to briefly in my last post): I went to London last week to crochet with shinykatie!

It's a funny story this: see, a couple weeks ago, I was out getting schnockered (read: drunk) with some friends, prior to going to see the new Indiana Jones film (which wasn't great, by the way). Just before departing my friend Claire's house, and just after downing more cider than I probably should have, I received a tweet from shinykatie, with the following text: *text will be inserted here once Twitter sorts itself out...For the meantime, the gist of it was inviting me to do some crochet thing in Crystal Palace*.

The response to this, of course, was me squealing. And immediately replying that I thought it would be fun. To which shinykatie responded that she thought I was loopy. Which is probably true.

Anyway, long story short, I trucked my butt all the way from Swindon to London (2 hours in the car) to sit on a table outside on the street in Crystal Palace, chat with Katie, and teach people to crochet. It was one of the best times I've had in a long time. I was surprised, actually, how many people came by who were willing to just sit down at our table and have a go. I taught two lefties and a little right-handed girl (uh, and myself at the same time, since I've never crocheted right-handed!). I'd never taught anyone to crochet before, so it was nerve-wracking at first, but in the end it was really great fun. Plus, around lunch time, someone brought us lovely strawberry parfaits, which were highly appreciated.

I feel that I should mention that the whole thing was organised by the ladies at It's a Green Thing, a superb little eco shop on Church Road. If you want to see a picture of me crocheting at our little booth, check out shinykatie's moblog, and if you just wanna read another great crochet blog, check out Good Hooking.

noisypitta.etsy.com

Works in progress, or, why I've not made anything FUN lately

I've figured out WITHOUT A DOUBT why I don't make garments: they take too frickin' long!!! The problem is, I realise this, then spend ages not making garments, forget why I don't make garments, and then give it a go again. Stupid garments! This is what I'm currently doing, and why I haven't made any progress making all the cute little dudes I doodle in my notebook:
I have been working on this project for the better part of, oh, four weeks? Okay, granted, I made a custom order of two aliens in the meantime, but COME ON! I have the attention span of a flea, so this is torturing me. But I bought 10 balls of yarn for this project and I will not have them just sitting around! I've finally made the decision to put some welly into it and actually work on finishing it so I can get on with other things that I've been brainstorming, such as:
  • A little screaming devil dude, complete with pointy tail and horns. Red, of course.
  • A stripey French monster with a beret, using my two-colour stripes with no joins technique.
  • A lop-eared bunny out of lilac-coloured organic wool, which I started at the crochet booth in Crystal Palace with Katie from Good Hooking (I'll have to post about this shortly).
Ah, well, excuses, excuses, right?!

noisypitta.etsy.com

Sunday, May 25, 2008

That bunny

...And here's that bunny that I made in Seattle:
noisypitta.etsy.com

I'm back!

Hi everyone! I'm back from a week in Seattle for my Grandpa's memorial, and then a week of struggling to survive through Horti peak season and 8-hour jet lag.

Oooooh, I spent WAY too much money on yarn and crochet accoutrements while I was there! (And yes, I know that's not strictly a correct use of the word "accoutrements", but I don't care...It sounds niiiiiice.) I think I spent about £30 in Seattle, on yarn and books, and another £25 when I got back, on more yarn to use on a pattern in one of the aforementioned books...Yikes. I justify it by saying that I'll probably end up making the money back in sales! I don't know if that will end up being true, but again, it sounds niiiiiiiiiiiiiiice.

While out in Seattle, I did quite a lot of crocheting...I was surprised that I managed to get so much done, but I guess it's different when you haven't got to do any housework or run around after a two-year-old! I made a kitten for my aunt Lynita, and a strange little bunny-type creature for my cousin Marina, which I will post here once I figure out how to get it off my phone...

Now that I'm back, I have made some little sachets for my neighbour, which will eventually be filled with lavender and hung in her closet, and I've started on a little devil 'gurumi...But my big project at the moment is the babydoll dress pattern from Crochet Me. It's a gorgeous little pattern, and I hope I don't mess it up! I purposely don't do garments because they're hard! I'm far too impatient to be diligent with gauge, etc. So we'll see.

Anyway, to wrap up this post, I feel as though I need to publicise the great places I saw when out in Seattle...
  • Village Yarn and Tea: My aunt Lynita took me to Village Yarn and Tea to meet her friend Anna, on the first day I was there. We browsed the shop for AGES, and then sat down to, omigod, the NICEST cuppa I have ever had. I was boring and went for a Scottish breakfast variety, but I also got a coconut tea scone (made with chopped up tea leaves that looked a little like poppy seeds) and clotted cream. Plus, the tea was served in gorgeous little tea sets, each one different...Mine was a sort of sea green colour with gold trim and a scalloped shape. Loooovvvveeeeellllly. Anyway, they have a fantastic selection of yarns and haberdashery, and the whole place smelled faintly of fudge brownies. Absolute heaven!
  • Jo-Ann Fabrics: It's a big chain, and everyone knows it, but I still wish I had one next door. It kicks Hobbycraft's butt up and down the block!!!
  • And one that I went to last time, but didn't get a chance to go on this trip: Main Street Yarn. It's got a great selection of lovely yarns to fondle. (Tee-hee!)

Happy hooking :)

noisypitta.etsy.com

Saturday, May 10, 2008

A quick note, then I'm off

Hi all...Sorry if you've been visiting and disappointed to find no new posts for a while. My grandfather passed away recently and things have been very busy for me.

However, you can expect a few more posts soon, as apparently I deal with grief, in part, by crocheting...

noisypitta.etsy.com

Tuesday, April 22, 2008

Another little green man...Another!

I've done it AGAIN! And this time I've learnt that I'm starting to lose patience with not having a "studio" in my house...I've finished another green dude, and I want to post him on Etsy, but it's so much effort to get the pictures all set up...

Bah, I'm just being lazy, I know. But it's starting to get my back up because I'm trying to do this kitten pattern as well, and every time I want to take a picture of what I'm doing, I have to set up the whole photo studio and it's a pain. I can see you thinking, now, why don't you just leave it set up? Well, I'll give you a hint: it's two years old, and its name is Jim. (My son, if you didn't get that hint.)

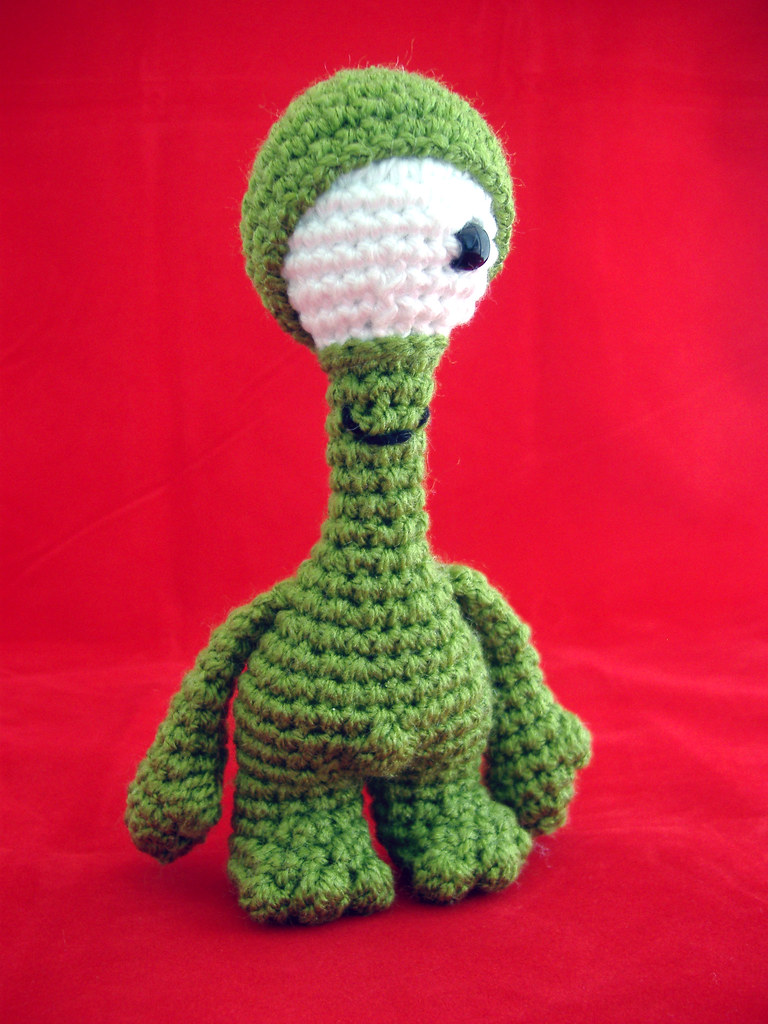
Anyway, moving on...Here's a taster of my latest little green man:
What do you think?

By the way...(Tip and trick coming!)...A tip that I learned from browsing some crocheting vids on YouTube: you can work a large pony bead into your fabric for an eye, and it will make it child-safe! Overall, this doll is as child-safe a doll as I have ever made: no PVC beads, only polyester filling; only embroidered features (e.g. smile) and an eye that won't come out unless you unravel the whole thing! The arms are whipstitched onto the body, but even if they come off, they're completely sealed before stitching on (using the tab technique like on my baby bird pattern, when I attached the wings).

I'm eager to get all of my things child-safe, not only because I have a child, but because I believe that these toys should be TOYS, and therefore made to be played with!

noisypitta.etsy.com

Wednesday, April 9, 2008

Cute Cherries

I discovered yesterday that inspiration can come from anywhere, at any time.

Picture the setting: you're sitting on your bum after a hard day's work, waiting for the chicken to boil down into stock, and you're watching a bit of "The Bionic Woman" from a couple weeks ago. Your hands start to itch, then twitch, and then you realise: you are a crocheter, you MUST crochet. Well, it's about 10:30 at night, and you know that if you stay up past 11, you won't get enough sleep, plus there's every chance that your gorgeous two-year-old son will want you to get up and play with him at 6 am. So what do you do? Start crocheting, knowing that it will keep you up late, or do you ignore the urges and try to take your mind off it with a Coke float and more "Bionic Woman"?

Well, I can tell you what I did...

Both! I poured myself a lovely Coke float, grabbed the new skein of red Pure Gold DK that I've had lying around, and I decided to make some little cherries with smiley faces because they're just so DARNED cute. And here's how they turned out:
And they only took me 1/2 hour. Pretty simple pattern, too:

Materials/Supplies
A small amount of red yarn
A small amount of green yarn
A small amount of black yarn
Crochet hook, the smallest size you can use that won't split your yarn when you work with it
Tapestry needle

Abbreviations used
sc: single crochet
st: stitch
inc: increase
invdec: invisible decrease

If there is anything you don't understand in this pattern, please comment below and I'll respond to you personally.

Gauge
Gauge is not used in this pattern; it will vary depending on the yarn and hook you use.

Cherries
The cherries are worked in spiral rounds. You should use a stitch marker to mark the beginning of each round, so you don't lose your place.

With red yarn, make a ring, work 6 sc into ring. (6 st)

Rnd 1: 2 sc in each st around. (12)
Rnds 2-3: inc 3, evenly spaced. (18 st at the end of rnd 3)
Rnd 4: work even. (18)
Rnd 5: invdec 6, evenly spaced. (12)

Now embroider a face onto the cherry using black yarn, using the photo as a guide. I used French knots for the eyes and back-stitching for the mouth.

Leaves
Make two leaves per cherry.

With green yarn, ch 5. Now work into the back loops of the ch: sc into 2nd ch from hook, then hdc in the next st, dc in the next st. 5 sc in the last stitch and turn to work in the front "v" loops of the foundation chain: dc in the next st, hdc in the next st, sc in the final st. Sl st into the last ch of the foundation chain (the one immediately before you made your first sc). Finish off and weave in ends.

Stems
For each stem, cut a length of green yarn about 4 times the length you want your stems to end up. To be safe, I used lengths about 2 feet long and cut them down as necessary once I was finished assembling!

To make the stem, thread the yarn onto a tapestry needle and through the "fat" end of one leaf, then through the top of the cherry (outside to inside). Then thread the yarn back out the top of the cherry and through the fat end of the other leaf. Tie a square knot in the yarn; this will make the leaves be securely attached. Finally, use the two halves of your length of yarn to make a twisted cord, and tie off.

Final assembly
To finish your cherries, stuff each one firmly, and close the holes by finishing off your red yarn, then threading the end onto a tapestry needle. Thread the yarn through the front loop only of each stitch around the hole, and pull tight; the hole will close naturally. Weave in the ends.

Oh, yeah, and don't forget to grin stupidly when examining your final product :)

noisypitta.etsy.com

Monday, April 7, 2008

Auuuggghh! What is it with green aliens?

Okay, I know, I KNOW. I think it might be a cardinal sin to post twice, once right after the other...But I didn't want these two thing to be in the same post, but I'm kind of on a blogging ROLL, ifyaknowhaddimean.

Look at this cute little green guy!!!
I appear to have an obsession with little green aliens.

Anyway, if you'll recall, this is the guy I'd sketched in my notebook a while back. It's actually turned out quite close to what I had envisioned, which is kind of a first for me. Usually, the way things look just kind of HAPPEN. So yeah, I'm proud of it.

I swear I'm going to go to the H-word for all this pride. (One of the seven deadly sins, isn't it?)

noisypitta.etsy.com

Kid-safe kitten

Okay, I'm being the proud 'gurumi-ist again. I have come up with the ultimate way of making toys kid-safe (kid-proof?) by crocheting arms and legs into the fabric as you go, and it's much more secure than simply whipstitching. Here's the latest kitten I've done:
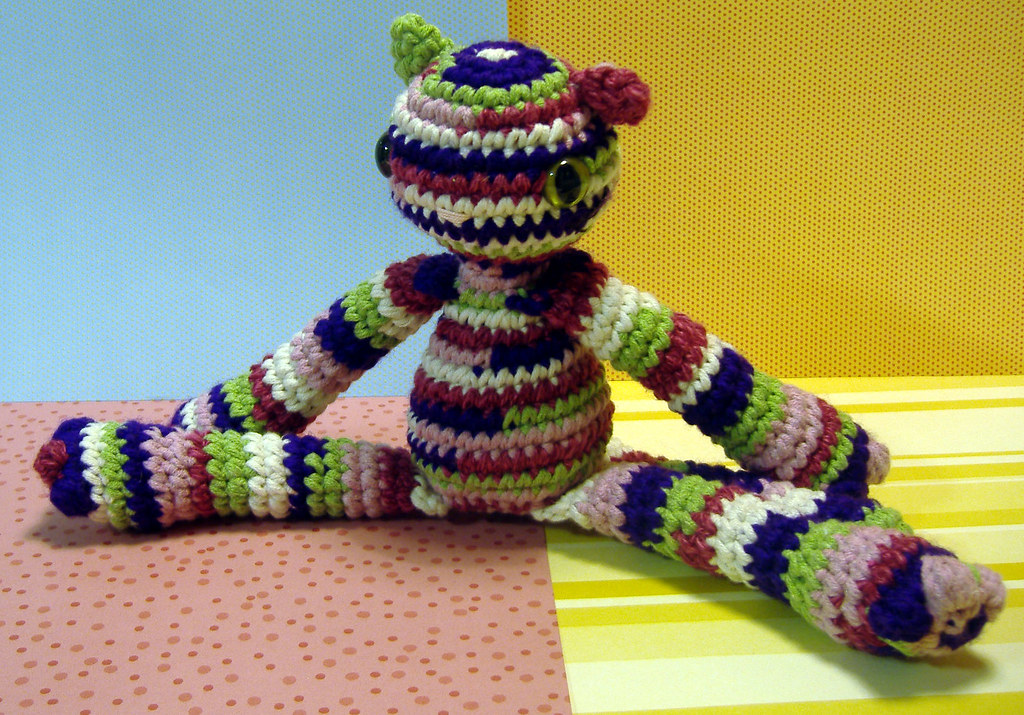
First off, I must explain the crazy nature of her colouring: it's a kind of "recycled yarn" look, like that Muji elephant I have. I did it because I had half a ball of five different yarns lying around; not enough to do a whole ANYTHING, but enough between them to accomplish something nice. It was a painstaking process to use this method, because it involved cutting each of the five balls into lengths of about 2ft, and then "randomly" tying them together as I wound a new ball out of them. I think the whole thing was worth it, though; I like the colour effect, and it got rid of A LOT of scrap yarn.

Anyway, the point of showing you the picture was so that you could see what the kitten looks like with "integrated" arms and legs. I'm sorry I haven't got a great closeup of it, but the joins look exactly the same as whipstitching, only because they're crocheted into the fabric, they're much stronger.

The idea is, you make the arms as normal; these ones are tubes with a circumference of 12 st. Then on the last round, only sc for half the stitches (in this case, 6 st), then ch 1 and pinch the fabric together. For the last 6 st, stitch through two layers of fabric. This gives you a nice, clean edge to your arm. (Please note, this is the same technique as Elisabeth Doherty uses in her book, "Amigurumi! Super Happy Crochet Cute", which can be found at Amazon.com or Amazon.co.uk.)

Once you've finished off your arms and legs, continue onto the head and body, working from the top down, and when you get to the place where you want your arms to be, you stitch through BOTH the last row of stitches of your arm, and the stitches on the body. Et voila! When I finally finish the kitten pattern (I KNOW, I've been promising this for ages), I will do two versions, one for the joined arms and one for the kid-safe arms.

noisypitta.etsy.com

Saturday, March 22, 2008

Yay!

I don't know if it's a special thing or not, but I just looked at the patterns page on CrochetMe.com, (where I posted the amigurumi baby bird/chick pattern), and I've got a "featured pattern"!

I'm over the moon!

noisypitta.etsy.com

What's cuter?

Okay, folks, so the question is, what's cuter? Generally speaking, the rules of cuteness state (okay, slightly paraphrased) that the bigger the head, proportionally speaking, the cuter something is. So I modified Poppet (the white kitten) to have a bigger head (the blue kitten), but actually, I'm not sure. I kind of liked Poppet as she was.

Any opinions?

noisypitta.etsy.com

Wednesday, March 19, 2008

Pattern: Amigurumi Chick/Bird, Just In Time For Easter

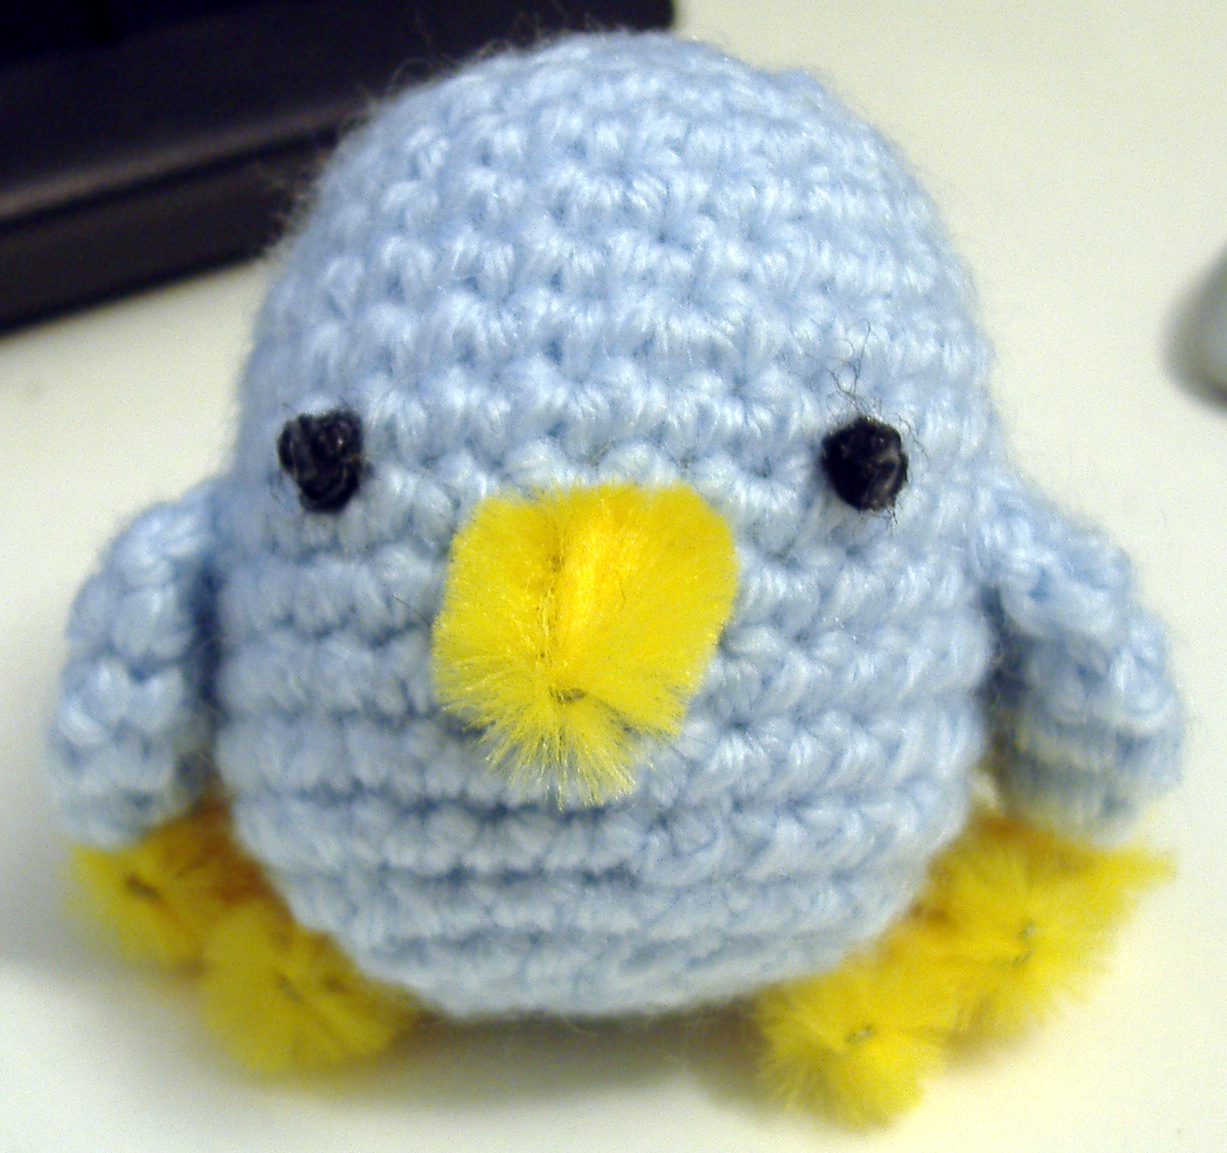
Just in time for Easter, you can make sweet little chicks and baby birds like the one in my last post.
Materials/supplies needed:
  • A small amount of yellow (chick) or blue (baby bird) yarn, double-knitting weight
  • A very small amount of black yarn, same weight as above
  • A small amount of polyester stuffing
  • 2.50 mm crochet hook
  • Tapestry needle
  • 1 pipe cleaner, orange (chick) or yellow (baby bird)
It doesn't really matter what type of yarn you use or what size hook you use; it will just change the size of the finished bird. I would suggest you use whatever yarn you can find, and use the smallest hook that you have that won't split the yarn when you work with it. The bird in the picture was made with 100% acrylic DK yarn and a 2.50 mm crochet hook, and stands about 1-1/2 inches tall.

Abbreviations used:

mr: make a ring
sc: single crochet
st: stitch
inc: increase
invdec: invisible decrease

If there is anything you don't understand in this pattern, please comment below and I'll respond to you personally.

Making the body:
Make a ring, and work 6 sc into the ring. (6 st)

Rnd 1: 2 sc in each st around. (12)
Rnd 2: (2 sc in next st, 1 sc in next st) 6 times. (18)
Rnds 3-6: inc 3 times evenly. (30 st at the end of rnd 6)
Rnds 7-8: work even. (30)
Rnds 9-12: invdec 3 times evenly. (18 st at the end of rnd 12)
Rnd 13: (invdec over next 2 st, sc in next st) 6 times. (12)

At this point, cut the yarn about 20 cm from your work, and pull the loop on your crochet hook bigger and bigger until the tail of the yarn comes through and you're left with a single strand coming out of your work.

Cut a 2" length of pipe cleaner and fold it in half; this will be your beak. Insert the two ends between rounds 7 and 8, two posts apart. Push the beak in until it's of the desired size, then twist the ends together inside so they're secure. Cut off any excess pipe cleaner.

With the tapestry needle and the black yarn, embroider a French knot for each eye, using the photo as a guide to placement. Don't forget to use a dab of craft glue on each French knot to hold it together, or it is likely to unravel.

Making and inserting the feet:
This part of the pattern is the most difficult to describe, so I've drawn a diagram:
The long and short of it is: use the remaining pipe cleaner to fashion two three-toed birds' feet, with the leg sticking upright.

The legs should be placed between rounds 11 and 12, 9 posts apart. To fix them in place, push the leg through the fabric, then twist it into a loop, which then lies flat against the fabric on the inside. I like to think of this configuration kind of like how you would imagine a snake coiled up in the bottom of a basket. Anyway, this whole exercise is to ensure that the leg can't simply be pulled out, so any way you can accomplish that is sufficient.

Finishing the body:
Now that you've finished the eyes, beak and feet, you can stuff your bird with a bit of polyester stuffing, and close the hole. I like to under-stuff these birds because they make quite good stress toys and they're fun to squeeze!

Close the hole by threading the end of your yarn onto a tapestry needle and inserting it through the front loop only of each st around. Pull the yarn tight, and the hole will close naturally. Then weave in the ends.

Making the wings (optional):
It's up to you whether you choose to put wings on your bird; some people insist they're just as cute without. If you would like to add wings, as in the picture, here's how you do it:

Make a ring, and work 6 sc into the ring. (6 st)

Rnd 1: 2 sc in each st around. (12)
Rnd 2: work even. (12)
Rnd 3: sc in the first 6 st, ch 1. Now, pinch the fabric together and for the next 6 st, stitch through both layers of the fabric. You will have stitched the wing closed, into a half-circle shape.

Fasten off, leaving a 20 cm tail. Repeat for the second wing.

To finish the bird, whipstitch the wings to its sides, using the photo as a guide.

And finally:
This bird is intended to be enjoyed by adults and older children only. Because there may be sharp ends on the pipe cleaners, I would avoid giving it to a child under three. (Also, if your kids are anything like mine is, they'll be quite good at pulling its little eyes out.)

noisypitta.etsy.com

Saturday, March 15, 2008

New Notebook Pages

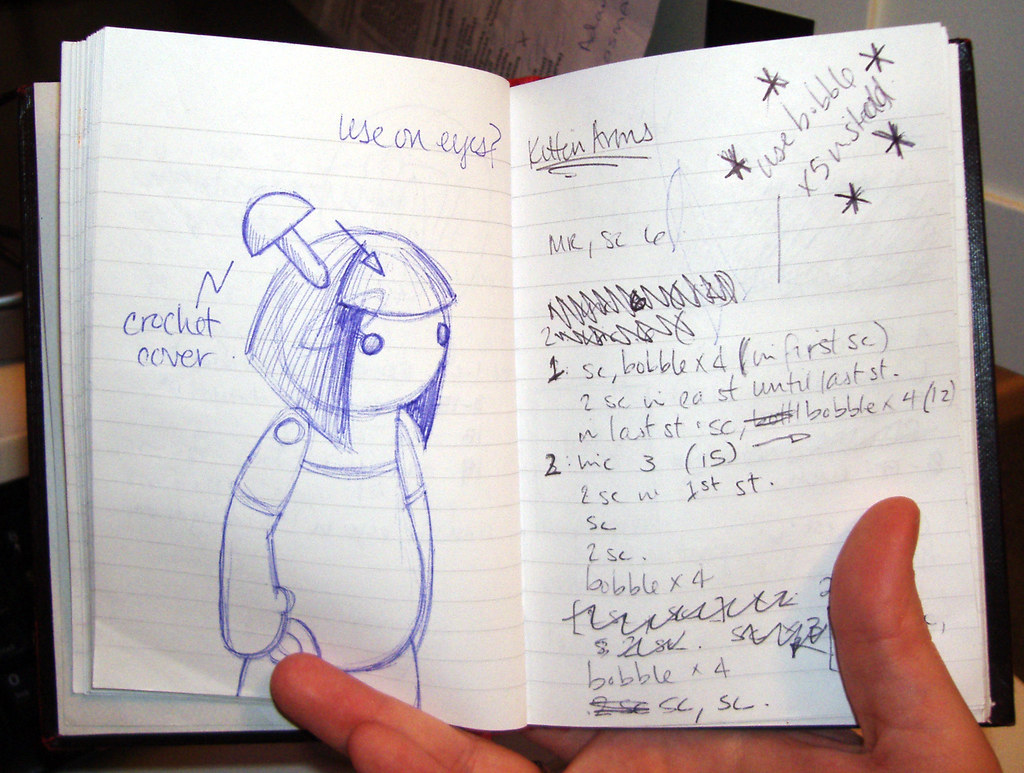
I scanned in a couple more pages from my crochet notebook the other day. Unfortunately, the scanner decided to crash the computer, TWICE, so I took snaps instead.This first one is of a little sketch for an amigurumi doll, perhaps with her joints on the outside...Hmmm. In order to accomplish this, I will probably have to move to proper teddy bear joints, but I'm not really ready to go there yet, I don't think. I've got plenty on my plate at the minute!

On the right-hand-side is the beginning of my kitten pattern, which you are entirely welcome to use, provided you can read/understand it!
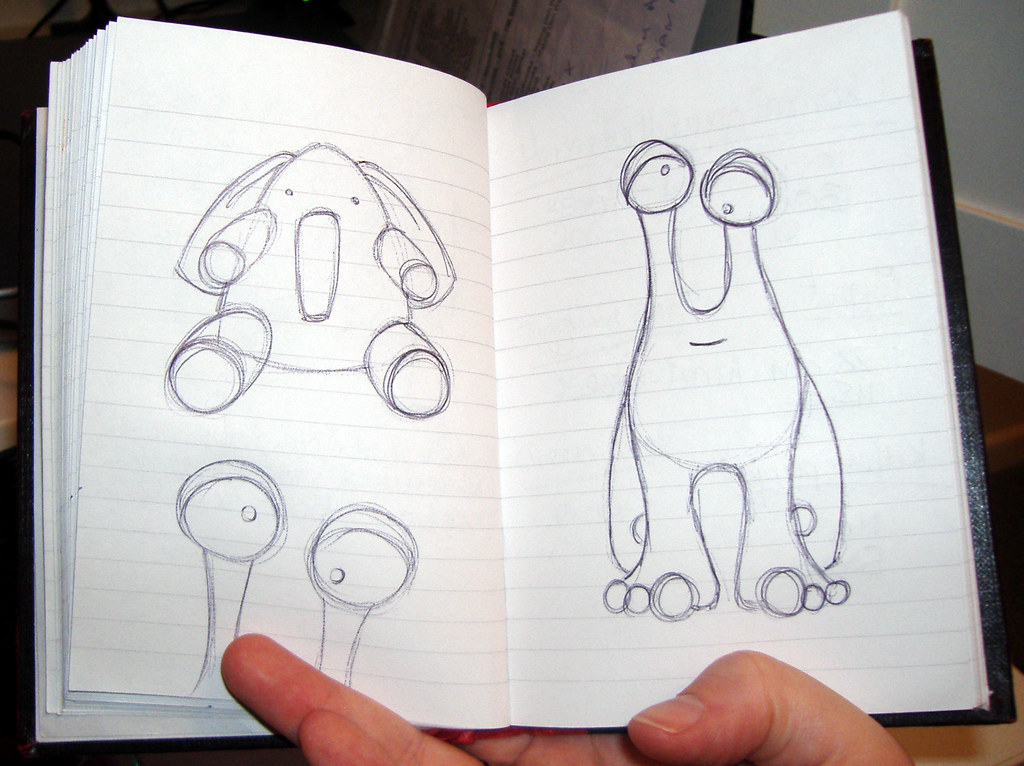
This next one is just a pair of sketches for some upcoming creatures. The elephant is inspired by a Muji plushie that I was given as a leaving gift from my last job, and the one on the right is just a weird little alien, who takes a bit of inspiration from Zorst, the barnacle alien on Space Pirates. I know, it' s obscure, but I like Zorst, because he's voiced by Dominic Byrne, the newsreader on the Chris Moyles Show (which I listen to on the way to work). Also, Space Pirates is on CBeebies, which I watch a lot with my son.

noisypitta.etsy.com

Thursday, March 13, 2008

Baby Birds!

Ooh, you are gonna LOVE this! I've got new eye candy for y'all :)

First off, in the spirit of the coming Easter holiday, and because Spring is gonna spring, like, ANY TIME NOW, I've been making up some baby birds and chicks:
Isn't it cute? Well, it's a funny story, actually...

I was in Bourton-on-the-Water this weekend, on an arranged sprog-handover between me and the inlaws (my son was off sick on Friday, so went to stay with Nana). I was there a little early, so I was wandering around the shops in town. I was pleased to get a chance to do it, since usually we never go in because the shops are quite small ("quaint", they call it here, but us Americans just call it "cramped"). Anyway, I found a "craft & needlework" shop, which, to me, screams out YAAAAARRRRRNNNNN! So I went in...

I am still, I should mention at this point, looking for the skintoned courtelle yarn that I was using on the baby project, since when I ordered it off the internet recently, I actually ordered the wrong colour, and I can't be bothered to buy more. So I thought that there might be a chance that this little shop would sell it.

Obviously, I was wrong!

Long story short, the guy was so nice and helpful that I decided to buy some yarn off him anyway, some lovely baby acrylic DK in pale yellow and pale blue, and it is out of this selfsame yarn that I am now making piles of baby birds and chicks. (And yes, the kitten pattern has been put on hold until after Easter.)

noisypitta.etsy.com
Sunday, March 9, 2008

No dice on the comp

Well, as you may well have already ascertained, I did not make the final of the Hobbycraft craft competition. Of course, if you see the finalists, you'll understand why! There are some fantastic creations on show, and you can still vote for your favourite by going onto their website.

I'm still working on the kitten pattern, doing some tweaks to the body shape. In the meantime, when I haven't been crocheting, I've also done some drawings for an elephant and a weird little alien dude. I also mistakenly started a little chick today, but I haven't got eyes that are small enough, so who knows what I'll do! I'm leaning toward the french knot route...

noisypitta.etsy.com

Monday, March 3, 2008

Kitten pattern coming, and Twitter

I am currently in the process of testing a pattern for a kitten not unlike Poppet...I have a few modifications, tweaks if you will, that I want to make, and I need to take some pictures, but once it's finished, I will be offering it for free to a few testers. Of course, I'll require a bit of feedback! It'll be the first pattern I've published, but I think it's fairly straightforward, and a good, solid pattern. Anyway, keep your eyes peeled, and of course, if you'd like to give it a try, please let me know!

Also, I have joined Twitter, so if you like, you can follow me, although at the moment, my username is not exclusively amigurumi! I have only found one other 'gurumi-ist, SAPlanet (Etsy shop here), and I would love to see some more of you on it. Wouldn't it be great, a little community of 'gurumi-ists all creating stuff together. 1-2-3...Awwwwwww.

noisypitta.etsy.com

Thursday, February 28, 2008

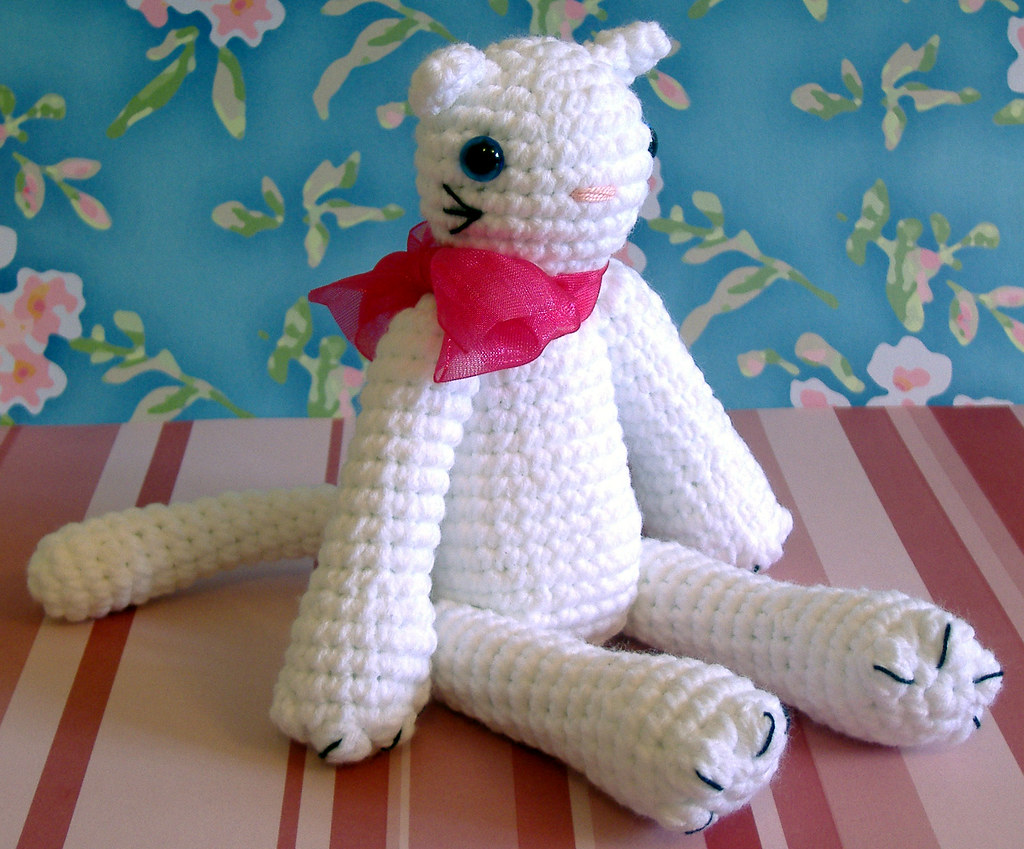
Poppet, the accidental kitten

Say, "Hello, Poppet!"

Well, when you run out of yarn for one project and are waiting with bated breath for the next lot to arrive, there's only one thing you can do: start another project! I know, I know, I said before that I don't like doing that, and, well, I don't. But this is the exception.

See, I've been stuck at home on my butt for three (going on four) days now; I was written off work for a week because of tonsillitis. I had it two weeks ago, did my whole course of antibiotics, then the day after I went off the penicillin, it flared up again. I didn't think it could possibly be tonsillitis again, so I didn't go to the doctor's until Friday, when I just couldn't take the pain anymore. He immediately told me to take a week off work, and sent me to the pharmacy with a prescription for THREE TIMES AS MUCH PENICILLIN. You can imagine the poorly tummy that has ensued as well, which isn't very nice, but hey! I've lost half a stone! Cool.

ANYWAY, back to the topic. Since I haven't had any yarn to work on the baby project, I decided to make a phone charm, loosely based on this kitten finger puppet:

However, when I had made most of the head and attached the little phone charm strap, I realised two things:

1) If you put this on a mobile phone, it's so big that if it hits you in the head, you will probably pass out.

2) Point number 1 is completely moot since the head is actually too big to fit back through the phone charm strap, making it impossible to attach it to anything in the first place.

So I gave up that idea.

Since I'd already made a head, I decided to go ahead an attach a body, which was fairly straightforward. The most difficult bits of this project were getting the bobble toes in the right places and embroidering the little toenails. (Well, the last bit was pretty easy, just fiddly.) There was a lot of thought in this process, too, which might not be obvious: Poppet has five toes on her front paws and only four on her back paws, just like real puddy-tats.

Probably the greatest annoyance/disappointment of the project was that, due to her size, I had to use 9mm eyes to hold on the arms and legs, but the brand of eyes that I've bought seems to have very short posts, and very painful washers to attach! They're fine for just using as eyes, but not great as joints. It ended up with me this morning leaning over my son's play table with an inside-out cat, a folded up bit of cloth, and putting all my weight on the washer to get it to go on. To be honest, I'm not entirely convinced that her arms and legs won't pop off in the future, if she were to be played with. However, she's really only meant for decoration, and I've said that in her listing on Etsy. And, probably a good thing, it's prompted me to create a product guarantee for my shop, which hopefully will put customers' minds at ease.

So finally, the plug:

Poppet is available in my Etsy shop!!!

noisypitta.etsy.com

Saturday, February 23, 2008

Well, I've Done It.

I wasn't sure if I would be able to go through with it, but I've submitted Harriet to the Hobbycraft competition. There are absolutely no indications of what types of things will be submitted, so who knows if I stand a chance...? We should find out the shortlist shortly.

Updated 27 Feb: The shortlist will be announced on Monday, 3rd March on the Hobbycraft website.

Wish me luck.

noisypitta.etsy.com

Argh!

Ah, yes. The bane of every crocheter...(Is that what you call one who crochets? Anyway...) I've run out of yarn!

My "baby" project stands thusly:


In other words, bodyless. Which is doubly annoying because I've just been written off from work because of tonsillitis, and doing anything but sitting around makes me incredibly tired. Which is PERFECT for crocheting, but in order to progress with this project, I have to get my butt dressed and out to the shops. I guess I could start another project, but I don't like doing that because then I have pieces strewn everywhere and blah, blah, blah.

If anyone knows a good online shop to get Pure Gold DK quickly (and, uh, cheaply), please do let me know.

I'm off to enter Harriet in a comp...Keep your fingers crossed for me.

noisypitta.etsy.com

Tuesday, February 19, 2008

Amigurumi Stripes With No Joins

One of the "experimental techniques" I tried recently was to get a lovely two-tone stripe, amigurumi-style, that didn't have joins or that icky jagged bit where you switch colours at the end of a round.

In response to a question on Flickr, I recently posted the following:
-----
Ooooh, I just did this (can you tell I'm quite proud of myself?)...I have some pictures here: www.flickr.com/photos/noisypitta/

The way I did it was:
1. Complete one round in one colour, put a stitch marker in the loop left on your hook.
2. Remove the crochet hook, join second colour in the first stitch of the last round, then begin a round in the next stitch, counting the join as the first stitch of the round (e.g. if you're doing all sc, join colour 2 into first stitch with a sl st, then sc in the next stitch).
3. When you get to the last stitch of colour 1, put a stitch marker in the loop of colour 2 that's left on your hook.
4. Remove the crochet hook and insert it back into the loop of colour 1 and carry on with the round.

Repeat steps 3 and 4 for as long as you need. When you get to where you want to finish one of the stripe colours (in my pictures, I "finished" the white and carried on with the blue), in step 3, you just make the last stitch a sl st instead of a normal sc. Then when you come to that stitch on the next round, it's a smooth transition back to the beginning of the round.

I think all that is very confusing (it's kinda hard to describe). Best is just to try it.

(In response to: When I crochet alternating strips for an amigurumi, the stripes never look right. There is always a hiccup stitch when I start the next color in the new round. Is this typical for everyone or just typical of my bad crocheting technique? -- posted by smoochas)
-----
I'm thinking about cabling and braiding next, and the holy grail (of course) is how to make colour joins with a round of slip stitches and not have that "step" where the sl st joins back up with the main part of the round (you know what I'm talking about, right?)...Hmmm...

noisypitta.etsy.com

Sunday, February 17, 2008

Harriet is finished

Okay, so actually, I finished Harriet a couple days ago. But I was really too scared to admit that she was done and that I wouldn't do any more work on her. Part of it was that I completed her when I was ill with tonsillitis, so I partly didn't trust that she didn't suck. Here she is:

And here's my favourite pic of her so far, so you can see the details in her face, necklace, ear and hair:


I haven't yet decided whether I'll enter her in the craft contest or not. And more to the point, whether I'll sell her or not.

noisypitta.etsy.com

Journal Sneak Peek

I believe everyone should keep a journal, if only as a way to keep thoughts so you don't lose them. I have struggled all my life with HOW to keep a journal...Try as I might, I was never able to keep a diary as a kid because I would set myself this rigid format of how a diary should be kept, and then I'd make myself stick to it, eventually getting bored and throwing it to the wayside. I also, for some unknown reason, believed that if you didn't write in a diary EVERY DAY, there was no point, or else you'd have to update the diary with everything that happened in between all the times you wrote, which was a labour-intensive process...I'm even getting tired thinking about it.

Nowadays, I have a PDA that keeps all my appointments, and a little black book that holds all my little sketches and notes for crochet projects (sadly, not all the phone numbers of my hot boyfriends...I'm happily married, thankyouverymuch). Here's a look inside, at my current project, a baby doll:


I've only made an arm, so far, and I'm starting to think it might not be chubby enough. But I'll have to do the rest of him and see...I'm thinking that if he's chubby enough in the head/belly, he won't need to be chubby in the arms because he'll just end up looking like a marshmallow man...Not reeeaaallllllyyy the look I'm going for!

Oh, yeah, and before I forget: I've added a bunch of new links to the right-hand side of the blog...One box is for "Inspiration", basically things that I find stylistically interesting and inspiring to my designs, and one box is for "Resources", basically where I buy all my stuff! Please have a look.

noisypitta.etsy.com

Friday, February 15, 2008

Oh, hello there!

Yes, folks, this is the ever-present "welcome to my blog" post...You know the one...Where you've just set up a shiny new blog and just HAVE to put something on it...

...Wait for it...

WELCOME TO MY BLOG!

Okay, now that that's out of the way...Right to it. Here's the latest girlie I'm working on:


I'd originally just started her to work on an idea I had for some articulated legs, but then I found out about this arts & crafts contest and I'm thinking about entering her in that (she isn't finished yet). However, I'm concerned that she's too much of a copy of Elisabeth Doherty's designs, since I used a lot of her methods from her book in creating this girlie. I've been (in a roundabout way) looking for some advice on this issue by posting a topic for discussion in the Amigurumi group on Flickr, but I haven't really had much response.

If I'm honest, I'm leaning toward not entering her, because I feel guilty, but actually, not that much of the design is a copy; the shape and proportions are after Elisabeth D's, and I've used her techniques, like bobble toes/fingers, articulated arms, eye patches...But I've also used a lot of my own techniques: articulated legs, belly button, hair, shoes (which aren't in the picture) and shorts that cover the articulated legs. And obviously, the outfit and hair are my own designs...I don't know if that counts as original or not. I guess my dilemma stems from the fact that up until Elisabeth D published her books, she was pretty much the only one out there doing these dolls, and now everyone can do them just by buying her book. But does that make the style prevalent enough for an design to be called original just because it's a variation on a theme? I can illustrate the conundrum this way: no one would ever consider someone a copycat for making a square cushion. That's because the generic square cushion design is so prevalent that just making that square look different, by adding different embellishments, say, is enough.

The flip side of the argument is that I did, in fact, design this girlie. I drew her, measured her up, sorted out all her accessories, and, finally, I MADE her. With my own hands. Should it matter that my doll's feet are exactly the same as Elisabeth D's? Even though I don't use the pattern anymore because that's just how I make feet now? Or should I arbitrarily change the shape of feet I use simply so that they're different from hers? And here's the kicker: Say you believe I'm a copycat because I make feet the same as in the pattern. Then I change the foot pattern I use so that I'm no longer exactly the same. Isn't that just as bad, really, because I've only arbitrarily changed a bit of someone else's design in order for you to say that it is no longer exactly the same? And more to the point, how much to I have to change it in order for it to be considered different?

This is giving me a headache.

I think it's one of those topics that gives everyone a headache. It annoys me because I don't think there's really a right answer, only sort of a mushy consensus. Blech.

noisypitta.etsy.com