I don't know if it's a special thing or not, but I just looked at the patterns page on CrochetMe.com, (where I posted the amigurumi baby bird/chick pattern), and I've got a "featured pattern"!
I'm over the moon!
noisypitta.etsy.com
Saturday, March 22, 2008
What's cuter?

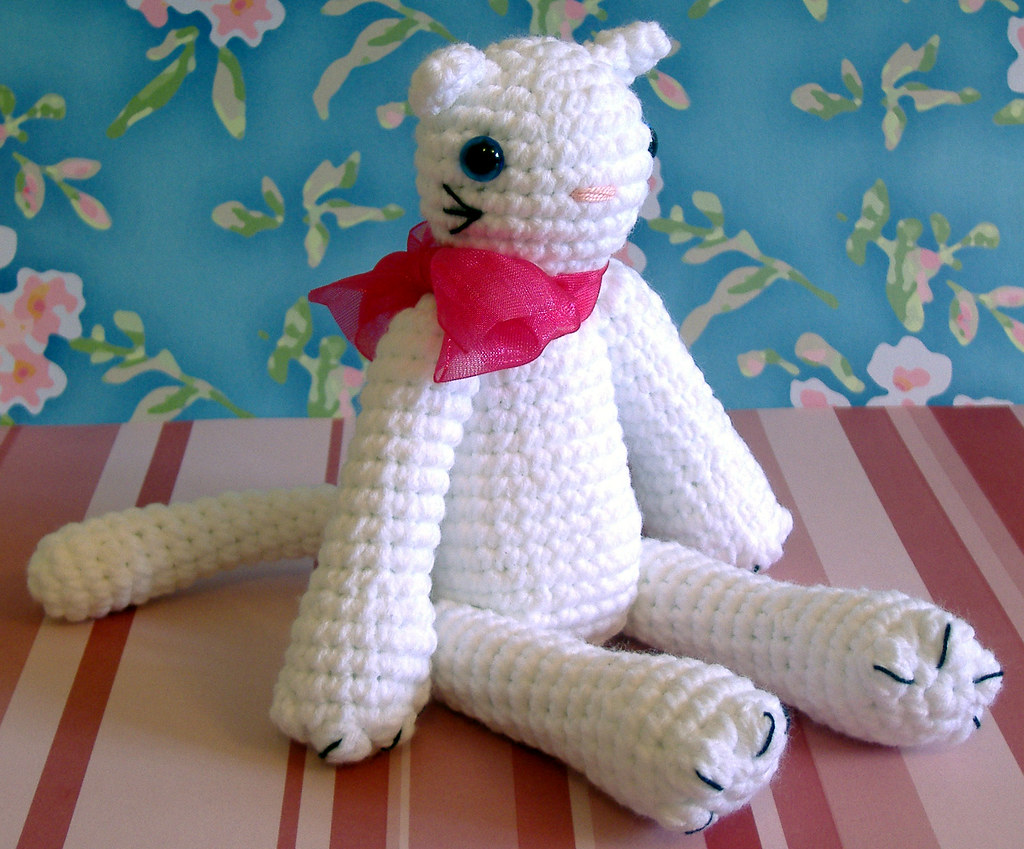
 Okay, folks, so the question is, what's cuter? Generally speaking, the rules of cuteness state (okay, slightly paraphrased) that the bigger the head, proportionally speaking, the cuter something is. So I modified Poppet (the white kitten) to have a bigger head (the blue kitten), but actually, I'm not sure. I kind of liked Poppet as she was.
Any opinions?
noisypitta.etsy.com
Wednesday, March 19, 2008
Pattern: Amigurumi Chick/Bird, Just In Time For Easter
Just in time for Easter, you can make sweet little chicks and baby birds like the one in my last post.
 Materials/supplies needed:
Abbreviations used:
mr: make a ring
sc: single crochet
st: stitch
inc: increase
invdec: invisible decrease
If there is anything you don't understand in this pattern, please comment below and I'll respond to you personally.
Making the body:
Make a ring, and work 6 sc into the ring. (6 st)
Rnd 1: 2 sc in each st around. (12)
Rnd 2: (2 sc in next st, 1 sc in next st) 6 times. (18)
Rnds 3-6: inc 3 times evenly. (30 st at the end of rnd 6)
Rnds 7-8: work even. (30)
Rnds 9-12: invdec 3 times evenly. (18 st at the end of rnd 12)
Rnd 13: (invdec over next 2 st, sc in next st) 6 times. (12)
At this point, cut the yarn about 20 cm from your work, and pull the loop on your crochet hook bigger and bigger until the tail of the yarn comes through and you're left with a single strand coming out of your work.
Cut a 2" length of pipe cleaner and fold it in half; this will be your beak. Insert the two ends between rounds 7 and 8, two posts apart. Push the beak in until it's of the desired size, then twist the ends together inside so they're secure. Cut off any excess pipe cleaner.
With the tapestry needle and the black yarn, embroider a French knot for each eye, using the photo as a guide to placement. Don't forget to use a dab of craft glue on each French knot to hold it together, or it is likely to unravel.
Making and inserting the feet:
This part of the pattern is the most difficult to describe, so I've drawn a diagram:
 The long and short of it is: use the remaining pipe cleaner to fashion two three-toed birds' feet, with the leg sticking upright.
The legs should be placed between rounds 11 and 12, 9 posts apart. To fix them in place, push the leg through the fabric, then twist it into a loop, which then lies flat against the fabric on the inside. I like to think of this configuration kind of like how you would imagine a snake coiled up in the bottom of a basket. Anyway, this whole exercise is to ensure that the leg can't simply be pulled out, so any way you can accomplish that is sufficient.
Finishing the body:
Now that you've finished the eyes, beak and feet, you can stuff your bird with a bit of polyester stuffing, and close the hole. I like to under-stuff these birds because they make quite good stress toys and they're fun to squeeze!
Close the hole by threading the end of your yarn onto a tapestry needle and inserting it through the front loop only of each st around. Pull the yarn tight, and the hole will close naturally. Then weave in the ends.
Making the wings (optional):
It's up to you whether you choose to put wings on your bird; some people insist they're just as cute without. If you would like to add wings, as in the picture, here's how you do it:
Make a ring, and work 6 sc into the ring. (6 st)
Rnd 1: 2 sc in each st around. (12)
Rnd 2: work even. (12)
Rnd 3: sc in the first 6 st, ch 1. Now, pinch the fabric together and for the next 6 st, stitch through both layers of the fabric. You will have stitched the wing closed, into a half-circle shape.
Fasten off, leaving a 20 cm tail. Repeat for the second wing.
To finish the bird, whipstitch the wings to its sides, using the photo as a guide.
And finally:
This bird is intended to be enjoyed by adults and older children only. Because there may be sharp ends on the pipe cleaners, I would avoid giving it to a child under three. (Also, if your kids are anything like mine is, they'll be quite good at pulling its little eyes out.)
noisypitta.etsy.com
 Materials/supplies needed:
- A small amount of yellow (chick) or blue (baby bird) yarn, double-knitting weight
- A very small amount of black yarn, same weight as above
- A small amount of polyester stuffing
- 2.50 mm crochet hook
- Tapestry needle
- 1 pipe cleaner, orange (chick) or yellow (baby bird)
Abbreviations used:
mr: make a ring
sc: single crochet
st: stitch
inc: increase
invdec: invisible decrease
If there is anything you don't understand in this pattern, please comment below and I'll respond to you personally.
Making the body:
Make a ring, and work 6 sc into the ring. (6 st)
Rnd 1: 2 sc in each st around. (12)
Rnd 2: (2 sc in next st, 1 sc in next st) 6 times. (18)
Rnds 3-6: inc 3 times evenly. (30 st at the end of rnd 6)
Rnds 7-8: work even. (30)
Rnds 9-12: invdec 3 times evenly. (18 st at the end of rnd 12)
Rnd 13: (invdec over next 2 st, sc in next st) 6 times. (12)
At this point, cut the yarn about 20 cm from your work, and pull the loop on your crochet hook bigger and bigger until the tail of the yarn comes through and you're left with a single strand coming out of your work.
Cut a 2" length of pipe cleaner and fold it in half; this will be your beak. Insert the two ends between rounds 7 and 8, two posts apart. Push the beak in until it's of the desired size, then twist the ends together inside so they're secure. Cut off any excess pipe cleaner.
With the tapestry needle and the black yarn, embroider a French knot for each eye, using the photo as a guide to placement. Don't forget to use a dab of craft glue on each French knot to hold it together, or it is likely to unravel.
Making and inserting the feet:
This part of the pattern is the most difficult to describe, so I've drawn a diagram:
 The long and short of it is: use the remaining pipe cleaner to fashion two three-toed birds' feet, with the leg sticking upright.
The legs should be placed between rounds 11 and 12, 9 posts apart. To fix them in place, push the leg through the fabric, then twist it into a loop, which then lies flat against the fabric on the inside. I like to think of this configuration kind of like how you would imagine a snake coiled up in the bottom of a basket. Anyway, this whole exercise is to ensure that the leg can't simply be pulled out, so any way you can accomplish that is sufficient.
Finishing the body:
Now that you've finished the eyes, beak and feet, you can stuff your bird with a bit of polyester stuffing, and close the hole. I like to under-stuff these birds because they make quite good stress toys and they're fun to squeeze!
Close the hole by threading the end of your yarn onto a tapestry needle and inserting it through the front loop only of each st around. Pull the yarn tight, and the hole will close naturally. Then weave in the ends.
Making the wings (optional):
It's up to you whether you choose to put wings on your bird; some people insist they're just as cute without. If you would like to add wings, as in the picture, here's how you do it:
Make a ring, and work 6 sc into the ring. (6 st)
Rnd 1: 2 sc in each st around. (12)
Rnd 2: work even. (12)
Rnd 3: sc in the first 6 st, ch 1. Now, pinch the fabric together and for the next 6 st, stitch through both layers of the fabric. You will have stitched the wing closed, into a half-circle shape.
Fasten off, leaving a 20 cm tail. Repeat for the second wing.
To finish the bird, whipstitch the wings to its sides, using the photo as a guide.
And finally:
This bird is intended to be enjoyed by adults and older children only. Because there may be sharp ends on the pipe cleaners, I would avoid giving it to a child under three. (Also, if your kids are anything like mine is, they'll be quite good at pulling its little eyes out.)
noisypitta.etsy.com
Saturday, March 15, 2008
New Notebook Pages
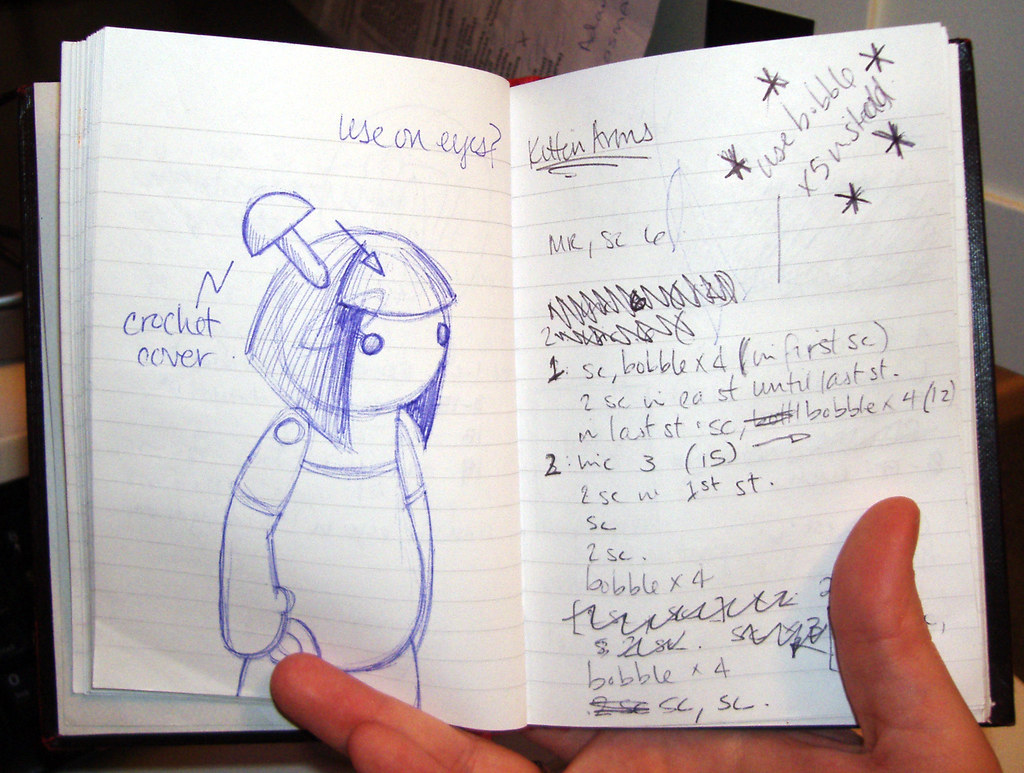
I scanned in a couple more pages from my crochet notebook the other day. Unfortunately, the scanner decided to crash the computer, TWICE, so I took snaps instead. This first one is of a little sketch for an amigurumi doll, perhaps with her joints on the outside...Hmmm. In order to accomplish this, I will probably have to move to proper teddy bear joints, but I'm not really ready to go there yet, I don't think. I've got plenty on my plate at the minute!
On the right-hand-side is the beginning of my kitten pattern, which you are entirely welcome to use, provided you can read/understand it!
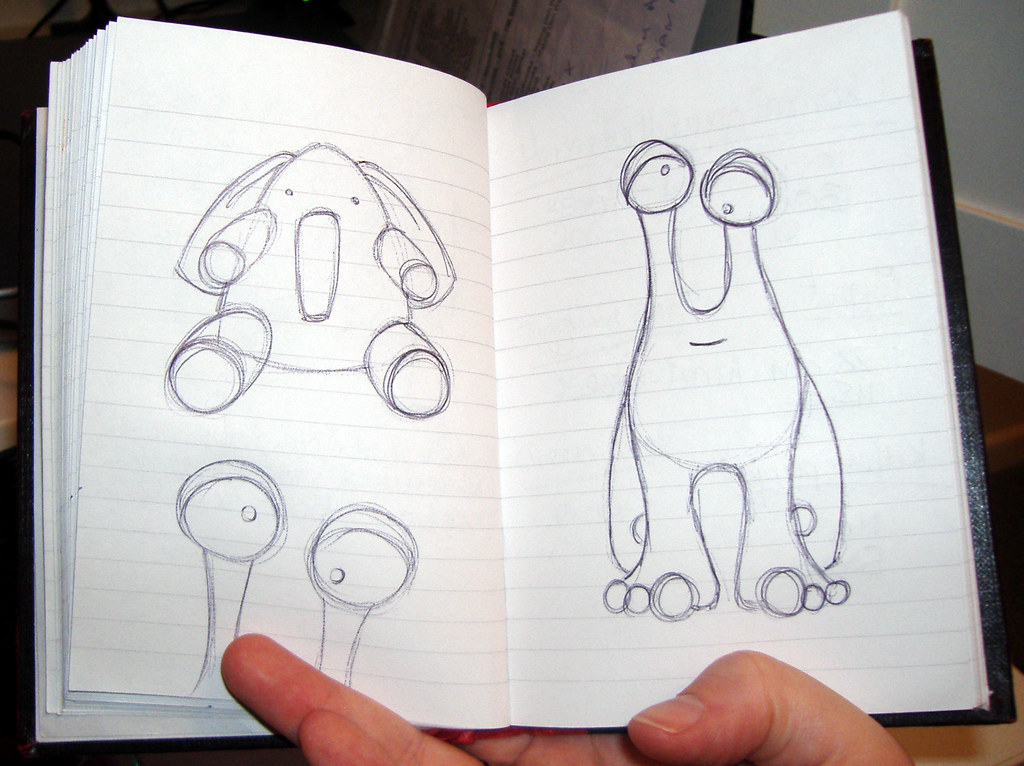
 This next one is just a pair of sketches for some upcoming creatures. The elephant is inspired by a Muji plushie that I was given as a leaving gift from my last job, and the one on the right is just a weird little alien, who takes a bit of inspiration from Zorst, the barnacle alien on Space Pirates. I know, it' s obscure, but I like Zorst, because he's voiced by Dominic Byrne, the newsreader on the Chris Moyles Show (which I listen to on the way to work). Also, Space Pirates is on CBeebies, which I watch a lot with my son.
noisypitta.etsy.com
 This first one is of a little sketch for an amigurumi doll, perhaps with her joints on the outside...Hmmm. In order to accomplish this, I will probably have to move to proper teddy bear joints, but I'm not really ready to go there yet, I don't think. I've got plenty on my plate at the minute!
On the right-hand-side is the beginning of my kitten pattern, which you are entirely welcome to use, provided you can read/understand it!
 This next one is just a pair of sketches for some upcoming creatures. The elephant is inspired by a Muji plushie that I was given as a leaving gift from my last job, and the one on the right is just a weird little alien, who takes a bit of inspiration from Zorst, the barnacle alien on Space Pirates. I know, it' s obscure, but I like Zorst, because he's voiced by Dominic Byrne, the newsreader on the Chris Moyles Show (which I listen to on the way to work). Also, Space Pirates is on CBeebies, which I watch a lot with my son.
noisypitta.etsy.com
Labels:
amigurumi,
crochet,
inspiration,
notebook
Thursday, March 13, 2008
Baby Birds!
Ooh, you are gonna LOVE this! I've got new eye candy for y'all :)
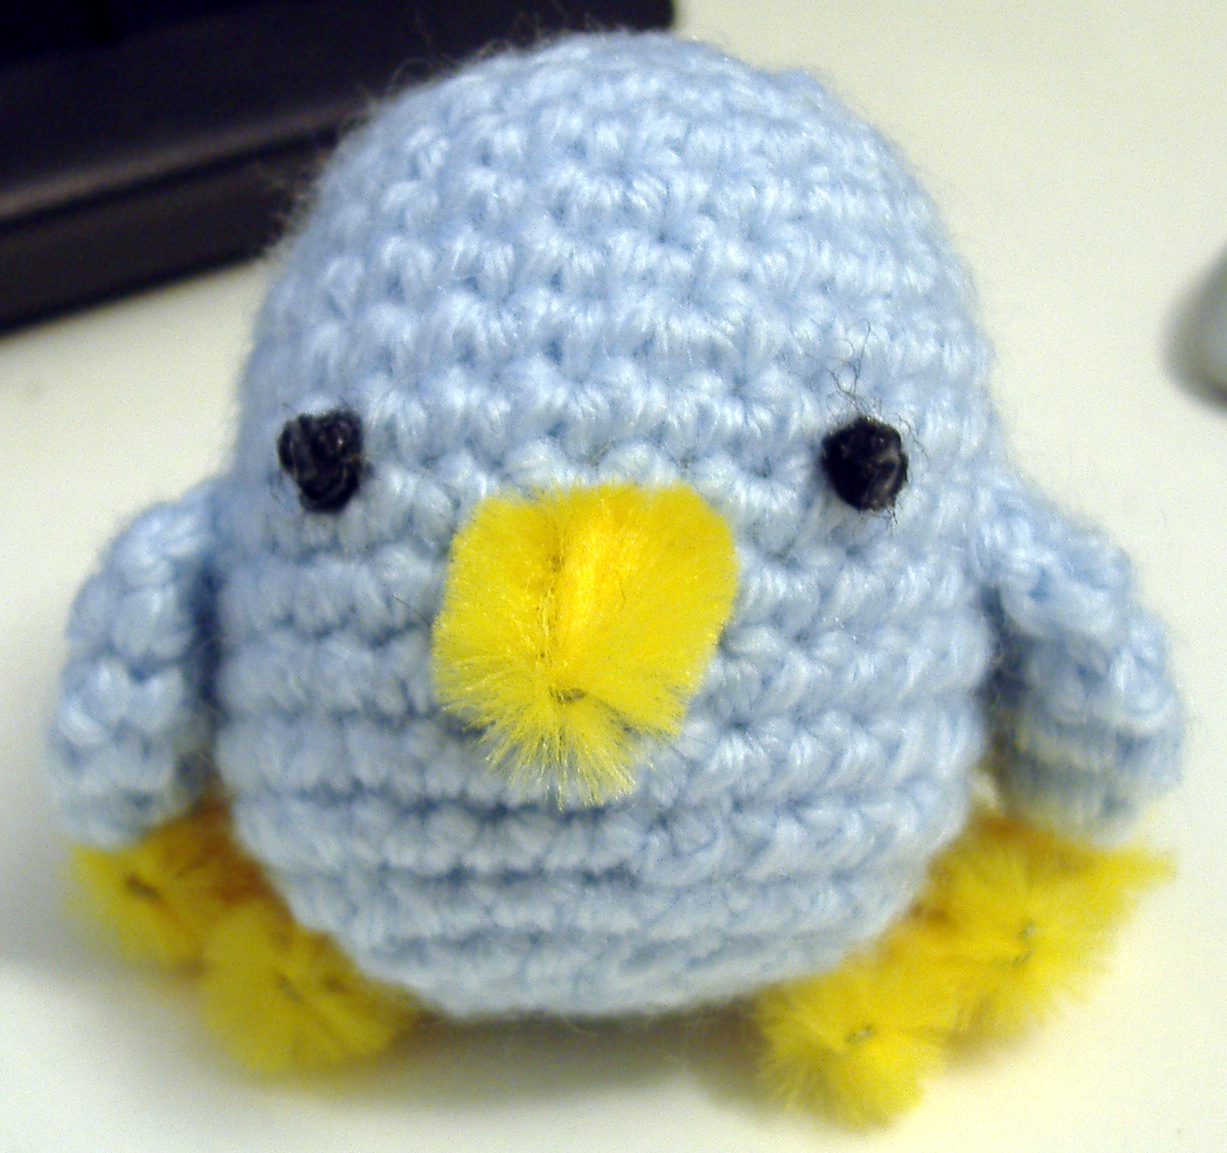
First off, in the spirit of the coming Easter holiday, and because Spring is gonna spring, like, ANY TIME NOW, I've been making up some baby birds and chicks:
 Isn't it cute? Well, it's a funny story, actually...
I was in Bourton-on-the-Water this weekend, on an arranged sprog-handover between me and the inlaws (my son was off sick on Friday, so went to stay with Nana). I was there a little early, so I was wandering around the shops in town. I was pleased to get a chance to do it, since usually we never go in because the shops are quite small ("quaint", they call it here, but us Americans just call it "cramped"). Anyway, I found a "craft & needlework" shop, which, to me, screams out YAAAAARRRRRNNNNN! So I went in...
I am still, I should mention at this point, looking for the skintoned courtelle yarn that I was using on the baby project, since when I ordered it off the internet recently, I actually ordered the wrong colour, and I can't be bothered to buy more. So I thought that there might be a chance that this little shop would sell it.
Obviously, I was wrong!
Long story short, the guy was so nice and helpful that I decided to buy some yarn off him anyway, some lovely baby acrylic DK in pale yellow and pale blue, and it is out of this selfsame yarn that I am now making piles of baby birds and chicks. (And yes, the kitten pattern has been put on hold until after Easter.)
noisypitta.etsy.com
First off, in the spirit of the coming Easter holiday, and because Spring is gonna spring, like, ANY TIME NOW, I've been making up some baby birds and chicks:
 Isn't it cute? Well, it's a funny story, actually...
I was in Bourton-on-the-Water this weekend, on an arranged sprog-handover between me and the inlaws (my son was off sick on Friday, so went to stay with Nana). I was there a little early, so I was wandering around the shops in town. I was pleased to get a chance to do it, since usually we never go in because the shops are quite small ("quaint", they call it here, but us Americans just call it "cramped"). Anyway, I found a "craft & needlework" shop, which, to me, screams out YAAAAARRRRRNNNNN! So I went in...
I am still, I should mention at this point, looking for the skintoned courtelle yarn that I was using on the baby project, since when I ordered it off the internet recently, I actually ordered the wrong colour, and I can't be bothered to buy more. So I thought that there might be a chance that this little shop would sell it.
Obviously, I was wrong!
Long story short, the guy was so nice and helpful that I decided to buy some yarn off him anyway, some lovely baby acrylic DK in pale yellow and pale blue, and it is out of this selfsame yarn that I am now making piles of baby birds and chicks. (And yes, the kitten pattern has been put on hold until after Easter.)
noisypitta.etsy.com
Sunday, March 9, 2008
No dice on the comp
Well, as you may well have already ascertained, I did not make the final of the Hobbycraft craft competition. Of course, if you see the finalists, you'll understand why! There are some fantastic creations on show, and you can still vote for your favourite by going onto their website.
I'm still working on the kitten pattern, doing some tweaks to the body shape. In the meantime, when I haven't been crocheting, I've also done some drawings for an elephant and a weird little alien dude. I also mistakenly started a little chick today, but I haven't got eyes that are small enough, so who knows what I'll do! I'm leaning toward the french knot route...
noisypitta.etsy.com
Labels:
alien,
amigurumi,
chick,
competition,
crochet,
elephant,
Hobbycraft,
kitten
Monday, March 3, 2008
Kitten pattern coming, and Twitter
I am currently in the process of testing a pattern for a kitten not unlike Poppet...I have a few modifications, tweaks if you will, that I want to make, and I need to take some pictures, but once it's finished, I will be offering it for free to a few testers. Of course, I'll require a bit of feedback! It'll be the first pattern I've published, but I think it's fairly straightforward, and a good, solid pattern. Anyway, keep your eyes peeled, and of course, if you'd like to give it a try, please let me know!
Also, I have joined Twitter, so if you like, you can follow me, although at the moment, my username is not exclusively amigurumi! I have only found one other 'gurumi-ist, SAPlanet (Etsy shop here), and I would love to see some more of you on it. Wouldn't it be great, a little community of 'gurumi-ists all creating stuff together. 1-2-3...Awwwwwww.
noisypitta.etsy.com
Subscribe to:
Comments (Atom)
