
Picture the setting: you're sitting on your bum after a hard day's work, waiting for the chicken to boil down into stock, and you're watching a bit of "The Bionic Woman" from a couple weeks ago. Your hands start to itch, then twitch, and then you realise: you are a crocheter, you MUST crochet. Well, it's about 10:30 at night, and you know that if you stay up past 11, you won't get enough sleep, plus there's every chance that your gorgeous two-year-old son will want you to get up and play with him at 6 am. So what do you do? Start crocheting, knowing that it will keep you up late, or do you ignore the urges and try to take your mind off it with a Coke float and more "Bionic Woman"?
Well, I can tell you what I did...
Both! I poured myself a lovely Coke float, grabbed the new skein of red Pure Gold DK that I've had lying around, and I decided to make some little cherries with smiley faces because they're just so DARNED cute. And here's how they turned out:
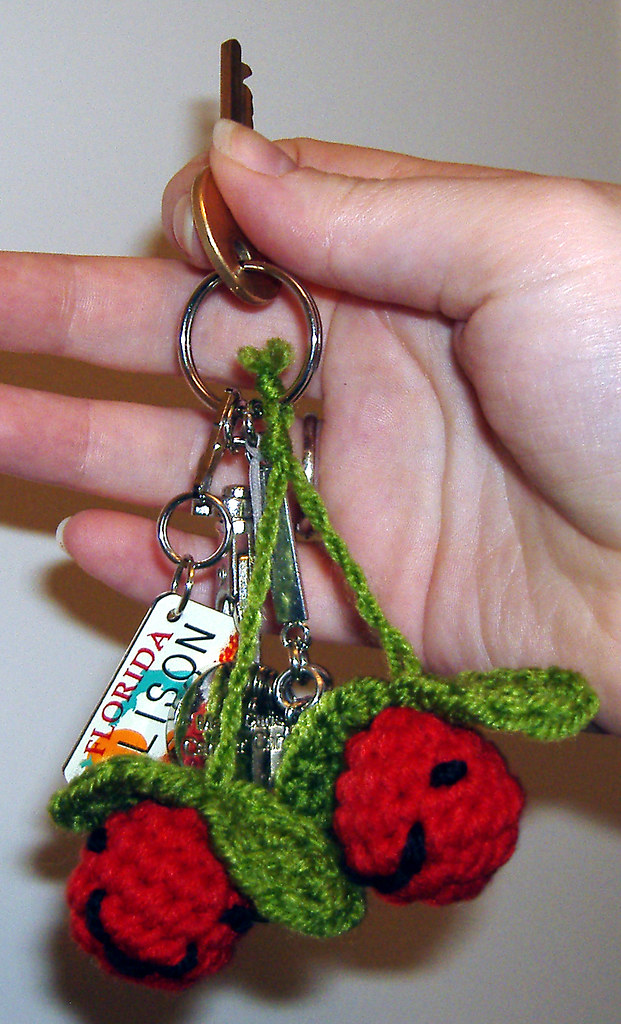
And they only took me 1/2 hour. Pretty simple pattern, too:
Materials/Supplies
A small amount of red yarn
A small amount of green yarn
A small amount of black yarn
Crochet hook, the smallest size you can use that won't split your yarn when you work with it
Tapestry needle
Abbreviations used
sc: single crochet
st: stitch
inc: increase
invdec: invisible decrease
If there is anything you don't understand in this pattern, please comment below and I'll respond to you personally.
Gauge
Gauge is not used in this pattern; it will vary depending on the yarn and hook you use.
Cherries
The cherries are worked in spiral rounds. You should use a stitch marker to mark the beginning of each round, so you don't lose your place.
With red yarn, make a ring, work 6 sc into ring. (6 st)
Rnd 1: 2 sc in each st around. (12)
Rnds 2-3: inc 3, evenly spaced. (18 st at the end of rnd 3)
Rnd 4: work even. (18)
Rnd 5: invdec 6, evenly spaced. (12)
Now embroider a face onto the cherry using black yarn, using the photo as a guide. I used French knots for the eyes and back-stitching for the mouth.
Leaves
Make two leaves per cherry.
With green yarn, ch 5. Now work into the back loops of the ch: sc into 2nd ch from hook, then hdc in the next st, dc in the next st. 5 sc in the last stitch and turn to work in the front "v" loops of the foundation chain: dc in the next st, hdc in the next st, sc in the final st. Sl st into the last ch of the foundation chain (the one immediately before you made your first sc). Finish off and weave in ends.
Stems
For each stem, cut a length of green yarn about 4 times the length you want your stems to end up. To be safe, I used lengths about 2 feet long and cut them down as necessary once I was finished assembling!
To make the stem, thread the yarn onto a tapestry needle and through the "fat" end of one leaf, then through the top of the cherry (outside to inside). Then thread the yarn back out the top of the cherry and through the fat end of the other leaf. Tie a square knot in the yarn; this will make the leaves be securely attached. Finally, use the two halves of your length of yarn to make a twisted cord, and tie off.
Final assembly
To finish your cherries, stuff each one firmly, and close the holes by finishing off your red yarn, then threading the end onto a tapestry needle. Thread the yarn through the front loop only of each stitch around the hole, and pull tight; the hole will close naturally. Weave in the ends.
Oh, yeah, and don't forget to grin stupidly when examining your final product :)
noisypitta.etsy.com
1 comment:
these are so adorable!!!!
Post a Comment